Monday, November 25, 2019
Collage by Clipping Mask
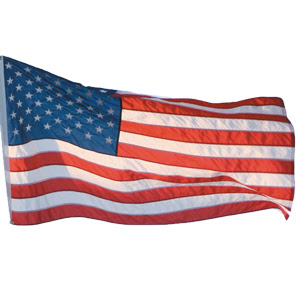
This collage had us pick a theme and make a collage using pictures that are related to that theme. The theme that I choose was American. This is why I used pictures of presidents and the Statue of Liberty because those are symbols that represent America. The background that I choose was the American flag since it represents American and fits nicely with my theme. A clipping mask is made up of different pictures. However, the pictures are only shown if they are within the boundaries of the bottom layer or the layer to which the photos are "slaved" to. A clipping mask is an example of non-destructive image editing since the original images can always be salvaged.
Sunday, November 24, 2019
Three Masking Techniques.
The first composition involved us having to replicate a certain aspect of our picture several times. there are different ways to do this but the way I found easiest is by using the clone stamp tool. I did this by moving the clone stamp over the picture of the traffic signal. Then I proceeded to use the clone to copies of a part of my image. The Second Composition had us use two images on top of one another. And make a mask on the top image to reveal the second image underneath. The third composition had us make a mask of one image. then we had to take that mask and composite it onto another image. Masking is an example of non-destructive image adjustments since you can always edit the mask or delete it without doing anything permanent to your image.


Thursday, November 7, 2019
Retouching
![]() |
| Before |
This the spot healing tool. this tool allows us to get rid of certain spots of a picture we don't need. in this picture i used the spot healing brush to get remove the plane so i have one dark night sky.
![]() |
| After |
![]() |
| Before |
![]() |
| After |
Using the content fill tool i was able to remove the lady in the distance from my photo.
| Before |
Using the clone stamp i was able to remove the clothing hanging in the back wall of my picture so it's just one wall with nothing on it.
![]() |
| After |
Tuesday, November 5, 2019
Photographic Hike
Taking the pictures had many challenges for me. One of the most challenging aspects was what do I had pictures to take of. I wasn't the most creative person so thinking of what to take a picture was challenging. My second challenge was to find the time to make to take these pictures between school and football.
Color Emphasis
Value Emphasis
Selective Focus
Rule Of ThirdsTexture Emphasis
Framing
Informal Balance
Monday, November 4, 2019
Non Destructive Image Adjustment
Non-destructive image editing allows you to edit the photo without deleting the original photo. The adjustment layer can be used to edit or change certain aspects of a photo in order to get what you need while still allowing you to have your original photo
Sunday, October 27, 2019
Photographic Composition
There are different ways of taking a photograph. One of these ways is the balance of a photo. Some photos are perfectly balanced. not one side of a photo has too much going on. If everything is symmetrical it is balanced and lacks movement. A photographer will use asymmetry (lack of symmetry), or unevenness, to create visual interest, tension, and movement. Framing refers to using elements of a photo to create a frame within your frame. For example, you might shoot through a doorway, branches, fences, tunnels, or arches to emphasize your something in your photo. Rule of Thirds is another way to take a photo. The basic principle behind the rule of thirds is to imagine breaking an image down into thirds so that you have 9 parts. then you would place points of interest in the intersections or along the lines that your photo becomes more balanced and will enable a viewer of the image to interact with it more naturally. Emphasis is when a photographer uses an area or object within the artwork that draws attention and becomes a focal point. during the time that I will have the camera, I will probably use the rule of thirds since in my neighborhood it is not very symmetrical. And each part is different.
American muscle
In this lab, we were given the assignment of making a robot out of spare parts. It could be made of anything that could be classified as spare parts. I decided to make a robot out of spare muscle car parts. I was able to find high-quality images on the internet to use for my project. but some parts of the images I didn't need. so I used the skills I previously learned in the melon head project to edit the pictures so I can get only the parts that I needed. I did pretty well on the project making sure my masks or edits of the different images were clean for a draft. However, one part that I will change is using an engine as a body apart since an engine counts as multiple parts. the skills I learned will be used in future projects because I was able to use an image that I found in order to make something of my design.
Monday, October 14, 2019
WBL Workshop One
During this first workshop, we learned what WBL even is and how it can benefit us. in addition, we also learned of the requirements that come with being in the WBL as well. WBL is an opportunity for us to learn certain skills that will be required in the future when we have to get a job. This includes how to write a resume as well as other skills. One thing that is very important about WBL is the opportunities that it offers. Such as getting to meet industry experts as well as getting paid internships. This will help me as it would be useful to know as a web designer to know people in an industry that I wanna work in.
MP1 reflection
In the lab, I learned the basics fundamentals of being a Web Designer. I learned how to use given pictures to create something while getting rid of the parts that I don't want or need. I also learned how to find my own high-quality images and how to edit them. Some of the other basics of being a Web Designer in this lab was about blend modes. I learned how a blend can affect a layer of the picture and what each one of them does. Learning the fundamentals of being a Wen Designer is important because if you don't know the basic stuff you will definitely fail or mess at more advanced aspects of being a Web Designer.
Melon Head
The melon head assignment had us replicate the face using different kinds are fruits. However, in order the make the face we had to edit the original pictures using different photoshop tools. To get the right image for the face. we had to use the marquee and lasso tool. Also, we had to use the wand and move tool. The wand tool was used to make a good edit of a picture based on color. While the move tool was used to arrange the fruits to make the face. The things I learned on this assignment can be used on future assignments when I need to edit a picture to get only the parts I need or to combine a bunch of pictures to make one picture.
Subscribe to:
Posts (Atom)